Difference between revisions of "NVGo"
| Line 1: | Line 1: | ||
{{Software | {{Software | ||
|Logo= [[image:logo_NVgo.png| | |Logo= [[image:logo_NVgo.png|50px]] | ||
|Name= NVGo | |Name= NVGo | ||
|Screenshot=[[File:MODS_51.png|120px]] | |Screenshot=[[File:MODS_51.png|120px]] | ||
Revision as of 13:39, 7 July 2020
| NVGo | |
|---|---|

|
|
| Developer | Oros SA |
| Type | Data Acquisition, Recorder |
| First release | 2018 |
| Latest Version | V1.1.5440 - September 2019 |
| Download | .apk Here |
| Operating system: | Android (only working with OR10 Hardware) |
| Language | English |
| Official website | oros.com and here! |
NVGo
NVGo is the MODS monitoring software for android devices. This app is designed to:
- Manage Templates for OR10 front-end and record setup.
- Adjust the front-end and recorder settings.
- Continuously monitor the signals in different domains (level, time and spectral).
- Start & stop recording.
- Add properties and comments to records.
- Manage records in OR10 memory.
Installation
1. Download the latest NVGo Android Package Kit (.APK) on your Tablet or smartphone.
2. On your Android device open the downloaded section and select the NVGo .apk file, then choose install.
3. Authorize the installation of unknown sources to install it directly
Connection to OR10
1. Start NVGo from the Android device.
2. Power on the OR10 hardware.
3. Wait for power-on to complete, until you get the main menu on the OR10 screen.
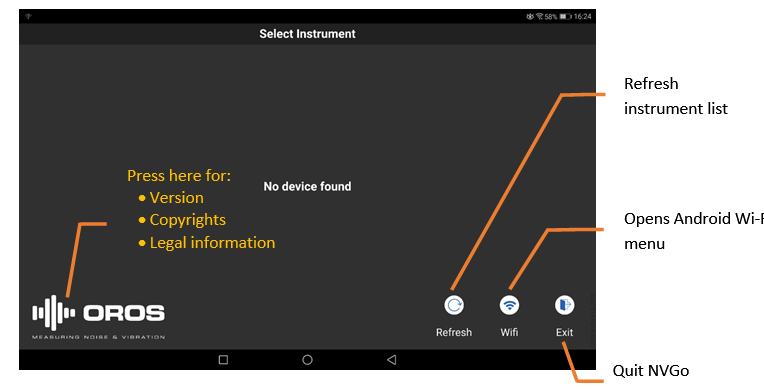
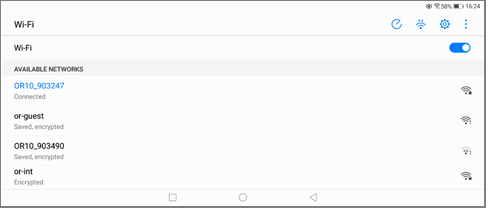
4. Press the "Wi-Fi" button on NVGo. The Android Wi-Fi menu is displayed.
5. Connect to the OR10.
6. Press Android back (<) button to return to NVGo.
Refresh the instrument list. When your OR10 appears showing "Ready", click on it to start NVGo with this instrument.
Main screen :
LiveView
LiveView screen shows the spectra and trigger blocks of the 2 highlighted inputs of the left column.
Displayed inputs are changed by swiping the graph up/down. It is also possible to select the displayed inputs by pressing the selected input from the left column.
FFT settings allows for adjusting averaging and resolution. The Y scale may be set to linear or log. This preference is saved in the Android device.
Signal
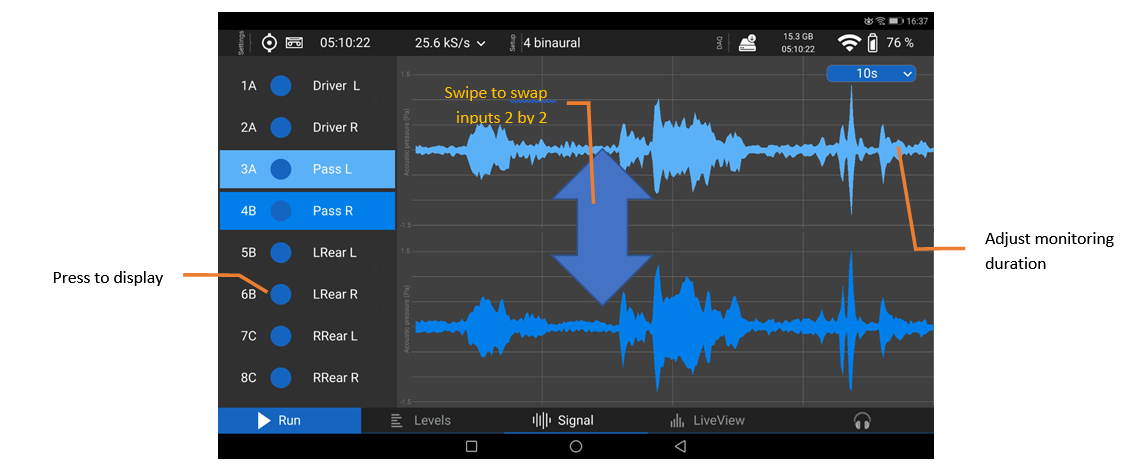
Signal shows the raw data envelope of the 2 highlighted inputs of the left column.
Displayed inputs are changed by swiping the graph up or down. It is also possible to select the displayed inputs by pressing the selected input from the left column.
Y scale is continuously adjusted to input ranges. When the 2 active inputs show the same units, both Y scales are identical.
Levels
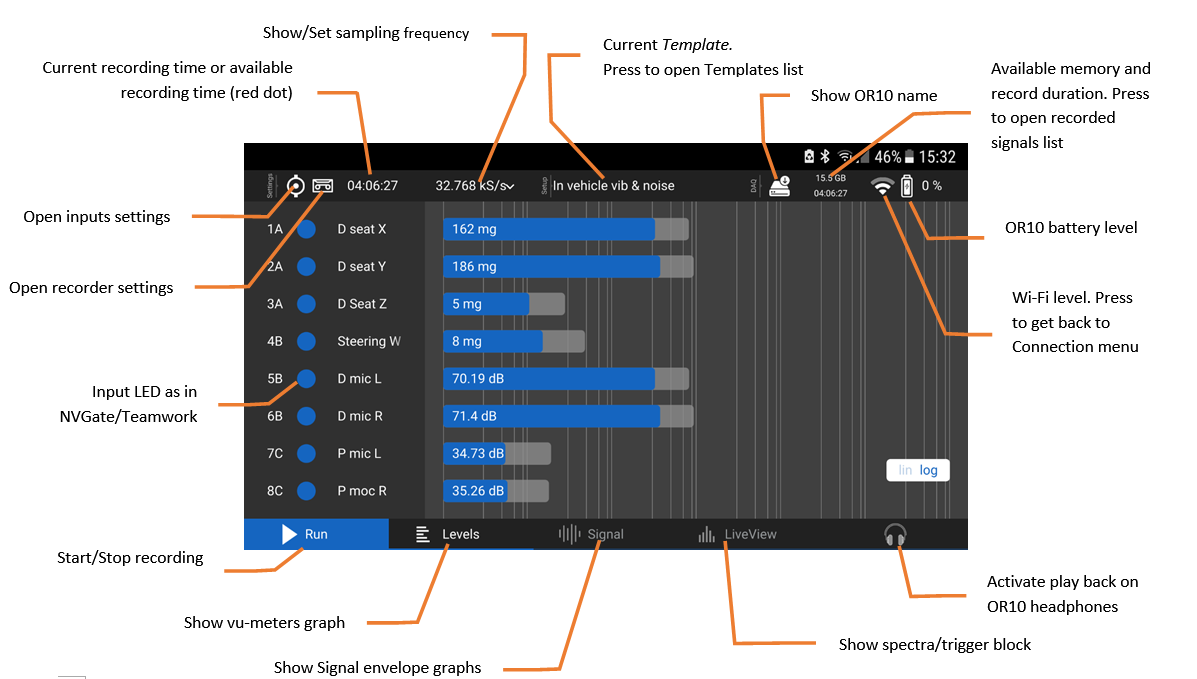
Levels shows the RMS and Peak levels of all dynamic inputs together.
Playback
Press the headphone icon on bottom right of the main screen to activate the playback. The 2 active inputs (blue background on the Signal and LiveView screens) are replayed on the OR10 headphone plug. The volume is automatically adjusted. Caution, the playback volume is dependent on the used headphone impedance. Signal amplitudes close to the range peak may generate high volume with low impedance headphone. Usage of very low impedance below 60 Ohms is not recommended. The stereo allocation of the played signals may be inverted by pressing the headphone button until the 2 background colors are inverted.
Setting up the OR10
Loading a Template
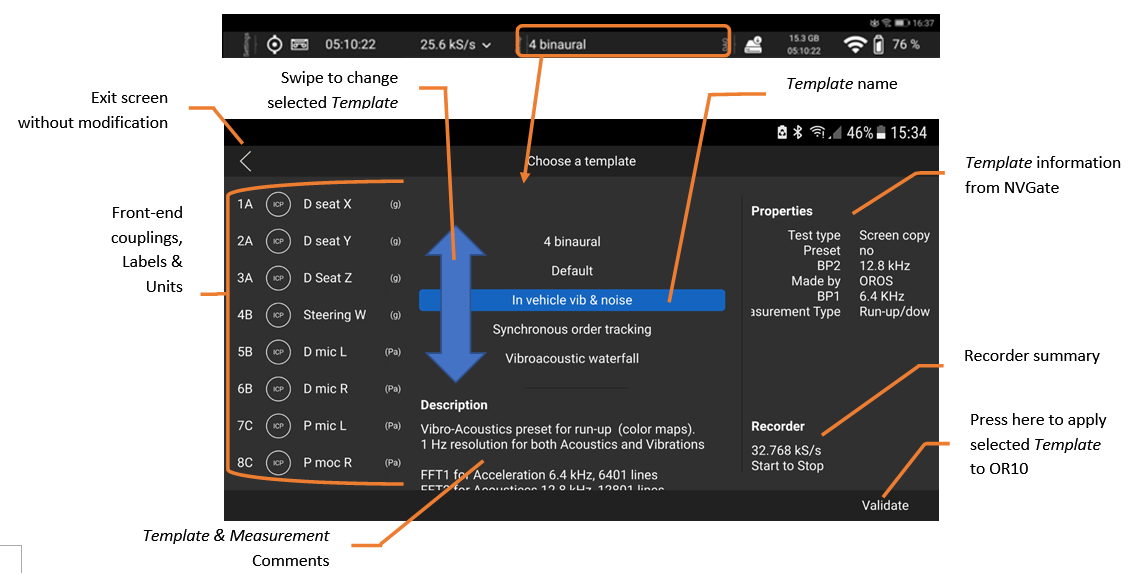
The Templates are generated and added to the OR10 memory with NVGate (see NVGate Template generation §). They are used in the same way NVGate Models is in order to setup the front-end with predefined settings. The Template properties and description will be saved in the Measurements made with it.
Press the central (Setup) field of the top ribbon to open the Template selection screen.
Adjust the Front-End
Input settings may be adjusted manually. Press the left (Settings) BNC button of the top ribbon to open the Front-End settings screen.
Adjust the Sampling Frequency
The sampling frequency is always displayed in the main screen. Simply select the desired sampling rate from the Top Ribbon drop down menu.
This menu is not available when the OR10 is recording.
Adjust the Recorder
The recorder mode and duration may be adjusted. On the left (in Settings), press the recorder button on the Top Ribbon to open the Recorder Settings screen. This menu is not available when the OR10 is recording.
You can choose between fixed duration Start to Time and manually controlled Start to Stop for recorder modes.
For Start to Time, the duration should be updated by editing the field or using the +/- buttons.
Make a Recording
Start Recording
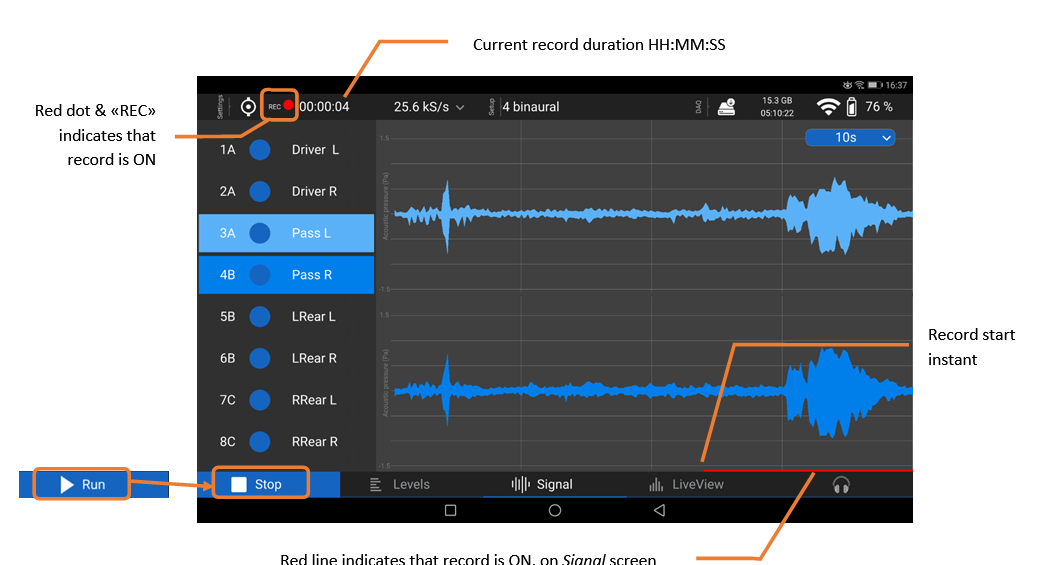
When the OR10 setup is done, the system is ready to start acquiring and saving the input data. To start the recording, press the bottom left Run button or press the "REC" button on the OR10.
To stop the recording, press Stop on the bottom left or press the "REC" button on the OR10. In Start to Time mode, the recording will stop automatically when the duration time is reached.
Save & Inform Recorded Data
When the record is finished, the save screen is shown.
Recordings are saved with the predefined base name of Template. A combination of 3 numbers and a letter is added to manage the multi-acquisitions:
- Letter is incremented while using the same Template for multiple acquisitions (called RUNs)
- Number is incremented and letter reset when Template is changed.
- Number and letter are automatically incremented to avoid overwriting existing files in the OR10 memory.
In that way, each RUN of a measurement type will be called: BaseName_102A, BaseName_102B, BaseName_102C, etc…
All the properties with contents are saved with the recorded data. Saved properties will be associated to the Measurement when records are imported into NVGate.
Check OR10 Memory Content
You may browse the OR10 recorded data from NVGo. Press on the Capacity field (DAQ) which is in the Top Ribbon on the right.
The Record list screen is displayed.
