Difference between revisions of "NVGate Post Analysis"
| Line 9: | Line 9: | ||
===Loading a signal=== | ===Loading a signal=== | ||
====New setup option==== | ====New setup option==== | ||
* From the [[NVGate Ribbons: Home Tab|Home tab / Start group]], press the ''Post-Analyze'' button. This will display a selection of signal files available for post-analysis: | |||
[[Image:Player_pa.png|framed|none]] | |||
* From the [[NVGate Project manager|project manager]], by right clicking on the signal you want to analyze. Choose '''Post-Analyze '''. | |||
[[Image:Player_connection_wizard_02.png|framed|none]] | |||
====Keep recording setup option==== | ====Keep recording setup option==== | ||
===Connecting the tracks NVGate=== | ===Connecting the tracks NVGate=== | ||
Revision as of 16:03, 25 May 2020
The Post Analysis of a signal is a mode of NVGate where the physical input of the frontend are replaced by the tracks of the signal load in the player. This will allow you to re-analyse a signal previously recorded. Therefore, this mode can be used to calculate new result from a previous measurement, or re-calculate results with different setups.
The post analysis mode can be made in connected (starting NVGate with the analyser) or office mode (starting NVGate with the dongle). However, we strongly advise to perform post analysis in Office mode, as the communication between the PC and the analyser will limit the performances. To do so, the signal must have been downloaded from the analyser to the computer.
Tutorial
In this tutorial, we will perform the post analysis of a signal recorded during a previous measurement with an OR36TW.
Parameters
Loading a signal
New setup option
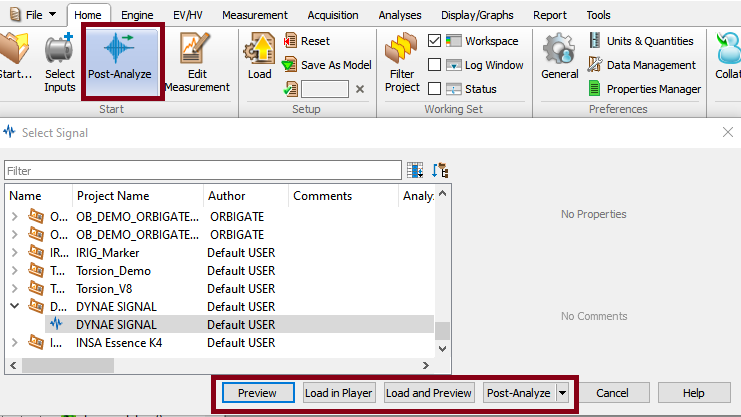
- From the Home tab / Start group, press the Post-Analyze button. This will display a selection of signal files available for post-analysis:
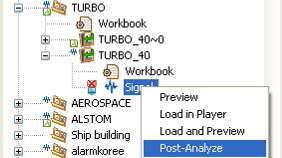
- From the project manager, by right clicking on the signal you want to analyze. Choose Post-Analyze .

